
Host Your Website for FREE: Automate GitHub Pages Deployment
Last Updated: February 2026
No servers. No cost. Just code and push.
Introduction: The “Free Hosting” Secret
Deploying a website usually involves buying a domain, paying for hosting, and using complex FTP tools. But if your website is static (HTML, CSS, JavaScript), you don’t need any of that.
GitHub Pages gives you professional hosting for free. GitHub Actions gives you automatic deployment.
In this guide, I will show you how to build a pipeline where every time you push code, your website updates automatically.
- Cost: ₹0
- Time: 10 Minutes
- Tech Stack: HTML, GitHub Actions, YAML.
1. What Are We Using?
Before we click buttons, let’s understand the tools.
- GitHub Pages: Think of this as your Web Server. It takes your HTML files and turns them into a live website URL (e.g., github.io).
- GitHub Actions: Think of this as your Robot. It watches your repository. When you make a change, it wakes up, grabs your code, and delivers it to GitHub Pages.
Step 1: Create Your Repository
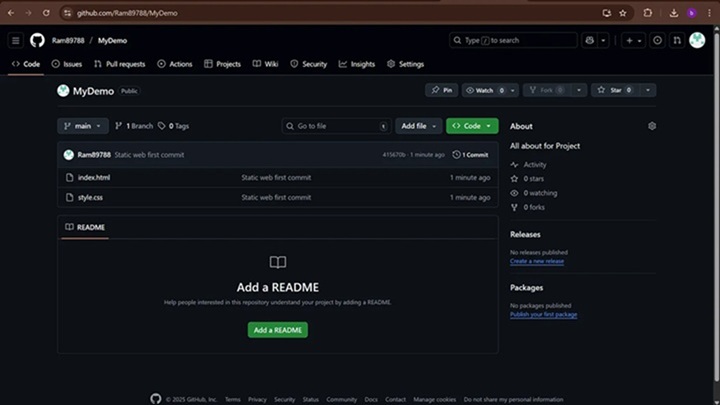
- Go to GitHub and click New Repository.
- Name: my-portfolio (or anything you like).
- Visibility: Select Public (Required for free GitHub Pages).
- Click Create Repository.
Step 2: Add Your Website Code
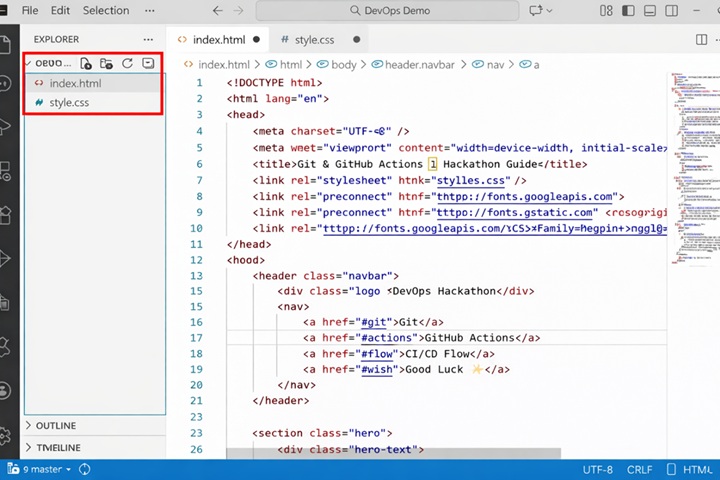
We need a simple website to test.
- Create a file named index.html.
- Paste this simple code.
<!DOCTYPE html>
<html>
<body>
    <h1>Hello! This site was deployed by a Robot 🤖</h1>
    <p>Welcome to my automated GitHub Pages site.</p>
</body>
</html>
3.Commit the file to your repository.
Step 3: The Automation (The YAML File)
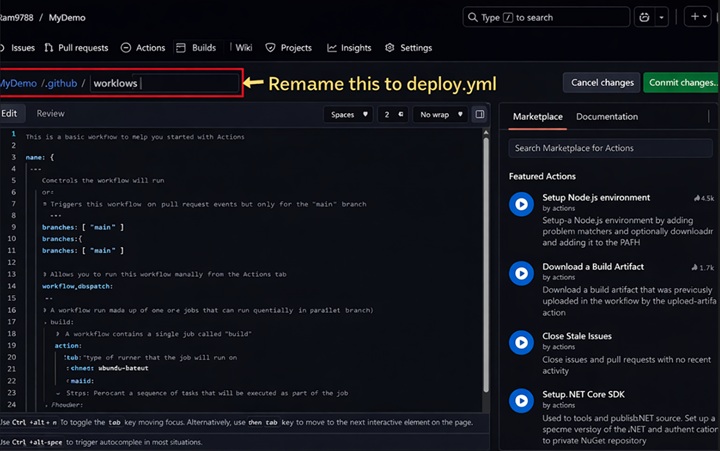
This is the most important step. We need to give instructions to our “Robot” (GitHub Actions).
- In your repo, click Add file -> Create new file.
- Name the file path exactly like this: .github/workflows/deploy.yml
- Paste this code (I have updated it to the latest standard):
YAML
name: Deploy static site to GitHub Pages
on:
push:
branches: ["main"] # Trigger on push to main branch
workflow_dispatch: # Allows you to click a button to run manually
# Security Permissions (Crucial for GitHub Pages)
permissions:
contents: read
pages: write
id-token: write
# Prevent crashes if you push twice quickly
concurrency:
group: "pages"
cancel-in-progress: true
jobs:
# Job 1: Build the site
build:
runs-on: ubuntu-latest
steps:
- name: Checkout Code
uses: actions/checkout@v4
- name: Upload Artifacts
uses: actions/upload-pages-artifact@v3
with:
path: '.' # Upload the entire folder
# Job 2: Deploy the site
deploy:
environment:
name: github-pages
url: ${{ steps.deployment.outputs.page_url }}
runs-on: ubuntu-latest
needs: build # Wait for 'build' to finish
steps:
- name: Deploy to GitHub Pages
id: deployment
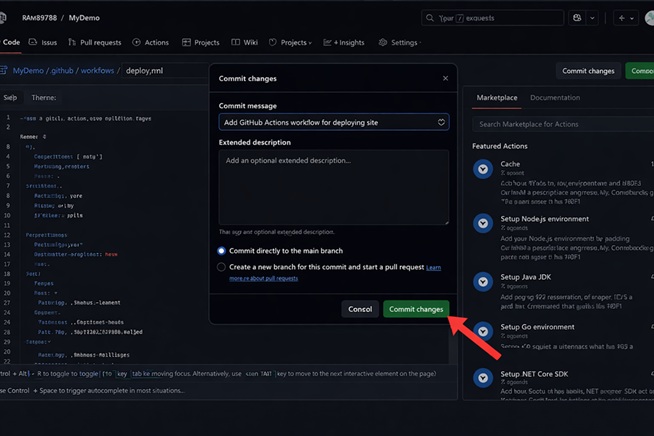
uses: actions/deploy-pages@v44.Once you paste the code, click ‘Commit changes’ at the top right.” Place this image there.
Trainer’s Breakdown (What does this code do?)
- on: push: The trigger. It watches for any “Push” event.
- permissions: By default, the robot is locked out. We give it write permission to update our Pages site.
- concurrency: If you push code, and then push again 10 seconds later, this setting cancels the first run so it doesn’t crash. (Pro Tip!)
- steps: These are the actions: Checkout Code → Upload Code → Deploy Code.
Step 4: Configure Repository Settings
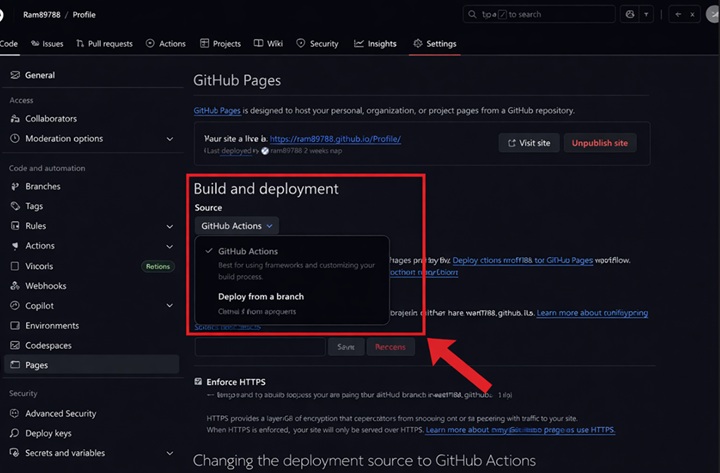
We need to tell GitHub to stop using the “Classic” deploy method and use our new “Actions” method.
- Go to Settings tab.
- On the left sidebar, click Pages.
- Under Build and deployment, change Source to GitHub Actions.
- (It should automatically verify your deploy.yml file).
Step 5: Watch It Go Live!
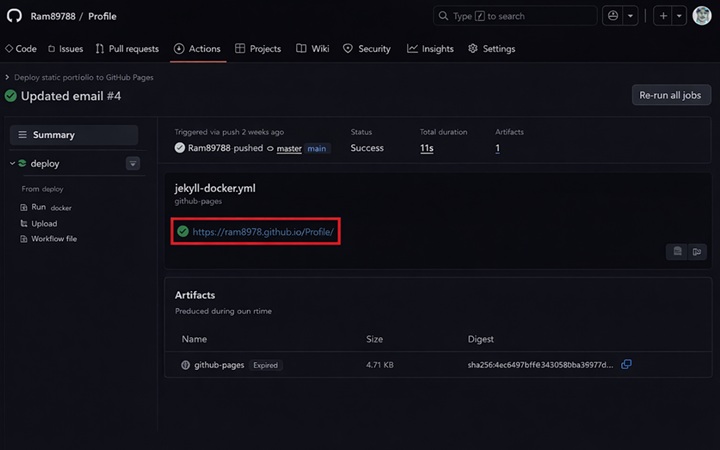
- Go to the Actions
- You will see a workflow running named “Deploy static site to GitHub Pages”.
- Wait for the circle to turn Green.
- Click on the workflow, then click the deploy
- You will see a link under “Deploy to GitHub Pages”. Click it.
Boom! Your website is live on the internet.
Step 6: The “Magic” Test

Let’s prove the automation works.
- Go back to index.html.
- Change the text to: <h1>I just updated this without touching a server! 🚀</h1>.
- Commit the change.
- Immediately check the Actions tab. The robot is already working!
- Once green, refresh your website. The text is updated.
Final Thoughts: Why This Matters
You just built a CI/CD Pipeline.
- CI (Continuous Integration): GitHub detected your code change.
- CD (Continuous Deployment): GitHub automatically put that code on a live server.
This is exactly how companies like Netflix and Amazon update their apps, just on a larger scale. You are now officially doing DevOps!